MOR-PLN-030 Version 1 Last Review Date: March, 2025
Portal - Environment Setup
Overview
This section covers the steps necessary to set up a local development environment. The The CMMS development environment requires specific versions of the software in the tech stack. It is important to install the versions mentioned as unexpected results may occur and/or the application may not run at all.
For users with a machine managed by CBC, you will likely find that installing some of this software will be blocked by ThreatLocker. It will be necessary to seek approval via VITG and CBC management to be able to install them. This can usually be done by clicking the 'Request Access' button on the ThreatLocker pop-up.
It is recommended to have the ThreatLocker blocked list active as some blocks can occur silently, meaning you may not know why a command fails and further delaying the setup process. Do this by right-clicking the ThreatLocker icon in the system tray and selecting 'Blocked Items'.
Install and Configure Software
- 1.1. Install Node.js
- 1.2. Install CLI Tools
- 1.3. Install and Setup Cosmos DB emulator
- 1.4. Install and Setup Azure Storage Emulator
- 1.5. Install and Setup SQL Server
- 1.6. Install and Setup Visual Studio
- 1.7. Install Azure SDK
- 1.8. Connect to DevOps Server
- 1.9. Install .NET framework
- 1.10. Install T4 Toolbox
Configure Dependencies
- 2.1. Restore NuGet packages
- 2.2. Install Dependencies
- 2.3. Initialise SQL Server
- 2.4. Setup Database Test Data
Run the Application Locally
- 3.1. Set Start-up Projects
- 3.2. Start The Application
Optional Tools
1. Install and Configure Software
1.1. Install Node
Node is a javascript runtime environment capable of running javascript for the solution when testing locally.
Note: Before installing node, review the Managing Multiple Versions of Node below as it is highly recommended to start with NVM than have to install it later. As refactors and upgrades occur, the required Node version may increase.
Current Version Requirement: 18.20.4 (as used in the build pipeline)
Node can be installed via the following link: https://nodejs.org/en/blog/release/v18.20.4 (opens in a new tab)
Managing Multiple Versions of Node
If you have other node versions already installed or may require in the future, please also install NVM from the following link.
-
Download NVM-Windows coreybutler/nvm-windows (github.com) (opens in a new tab)
- The 'nvm-setup.exe' link allows the download of an installer.
- Further information can also be found GitHub
- coreybutler/nvm-windows: A node.js version management utility for Windows. Ironically written in Go.
- NOTE: As of March 2025, there is a bug in the latest version that prevents the install of npm. If you have this issue, downgrade to v1.1.2. Which can be downloaded here: https://github.com/coreybutler/nvm-windows/releases/tag/1.1.12 (opens in a new tab)
-
Install NVM-Windows
- Follow directions and select defaults, but deselect notification options.
- During installation, NVWM-Windows may detect existing installs of Node and will ask if you wish NVM-Windows to manage them. Click 'Yes' for each.
-
Adding Node versions to NWM-Windows
- Open a command prompt
- Run command:
nvm install 18.20.4
Issues with installing 'npm'
Normally, the required npm version is installed when installing the required version of node, however the latest version of NVM-Windows has a bug that prevents the install of npm. Downgrade to v1.1.2 if this occurs.
1.2. Install CLI tools
Run the following commands from the command prompt:
npm install -g typingsnpm install -g gulp-clinpm install -g karma-clitypings install
1.3. Install and Setup Cosmos DB Emulator
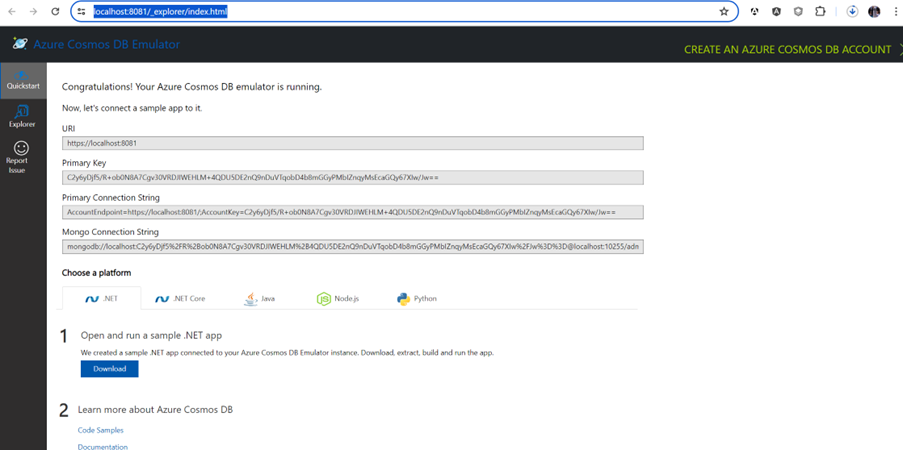
The Azure Cosmos DB emulator provides a local environment that emulates the Azure Cosmos DB service designed for development purposes. Using the emulator, you can develop and test your application locally, without creating an Azure subscription or incurring any service costs.
Download the emulator here: https://aka.ms/cosmosdb-emulator (opens in a new tab)
Once installed,
- Start the emulator by selecting the application in the Windows Start menu.
- Alternatively, you can start the emulator's executable (Microsoft.Azure.Cosmos.Emulator.exe) at the %ProgramFiles%\Azure Cosmos DB Emulator path. After executing the Cosmos Emulator, you can verify and see the details via https://localhost:8081/_explorer/index.html (opens in a new tab)
For example:-
1.4. Install and Setup Azure Storage Emulator
The Microsoft Azure Storage Emulator is a tool that emulates the Azure Blob, Queue, and Table services for local development purposes. You can test your application against the storage services locally without creating an Azure subscription or incurring any costs.
You can download the installer here https://go.microsoft.com/fwlink/?linkid=717179&clcid=0x409 (opens in a new tab)
To start the Azure Storage Emulator:
- Select the Start button or press the Windows key.
- Begin typing Azure Storage Emulator.
- Select the emulator from the list of displayed applications. When the Storage Emulator starts, a Command Prompt window will appear. You can use this console window to start and stop the Storage Emulator. You can also clear data, get status, and initialize the emulator from the command prompt. Visual Studio
You may already have Visual Studio installed, but if you do not, please download and install visual studio here :- https://visualstudio.microsoft.com/downloads/ (opens in a new tab)
1.5. Install MS SQL Server 2016+
Microsoft SQL Server 2016 can be installed but CMMS will run successfully with SQL Server 2022. Therefore we recommend installing SQL Server 2022 from the following link :- https://go.microsoft.com/fwlink/p/?linkid=2215158&clcid=0xc09&culture=en-au&country=au (opens in a new tab)
Installation
On installation, choose Basic.
Possible Issues
You may encounter an error at the end stage of installation:
Unable to install SQL Server (setup.exe). Exit code (Decimal): -2068052310Error description: An installtion package for the product Microsoft ODBC Driver 17 for Sql Server cannot be found. Try the installation again using a valid copy of the installation package 'msodbcsql.msi'
This indicates the ODBC driver is not present and needs to be installed. This can be downloaded here: https://learn.microsoft.com/en-us/sql/connect/odbc/download-odbc-driver-for-sql-server?view=sql-server-ver15 (opens in a new tab)
Post Installation
Once installed, the ‘Full-Text...' feature needs to be added.
- Go to Windows start and execute
- sql Server 2022 Installation Center (64-bit)
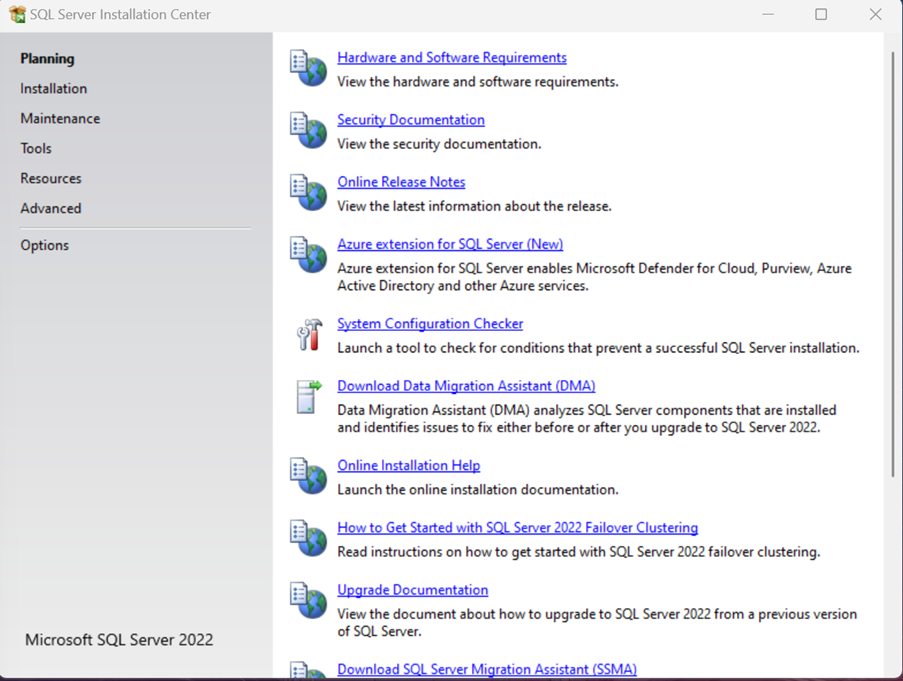
Choose Installation on the left -hand side and you will be presented with the following.

Select

You will be presented with a screen that will ask for your SQL Server media location. See below for standard .
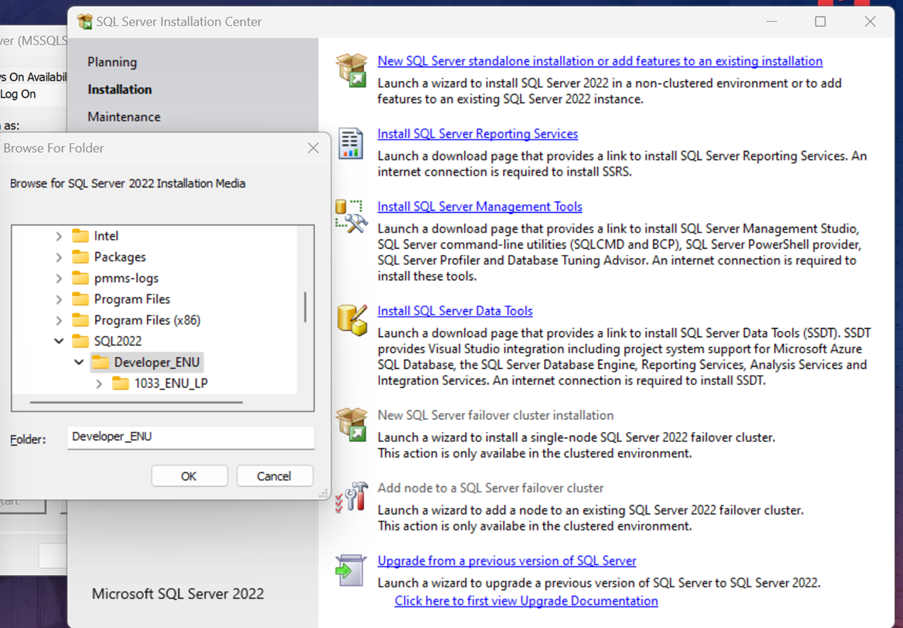
Click next until you get to the following screen, then select Add Features
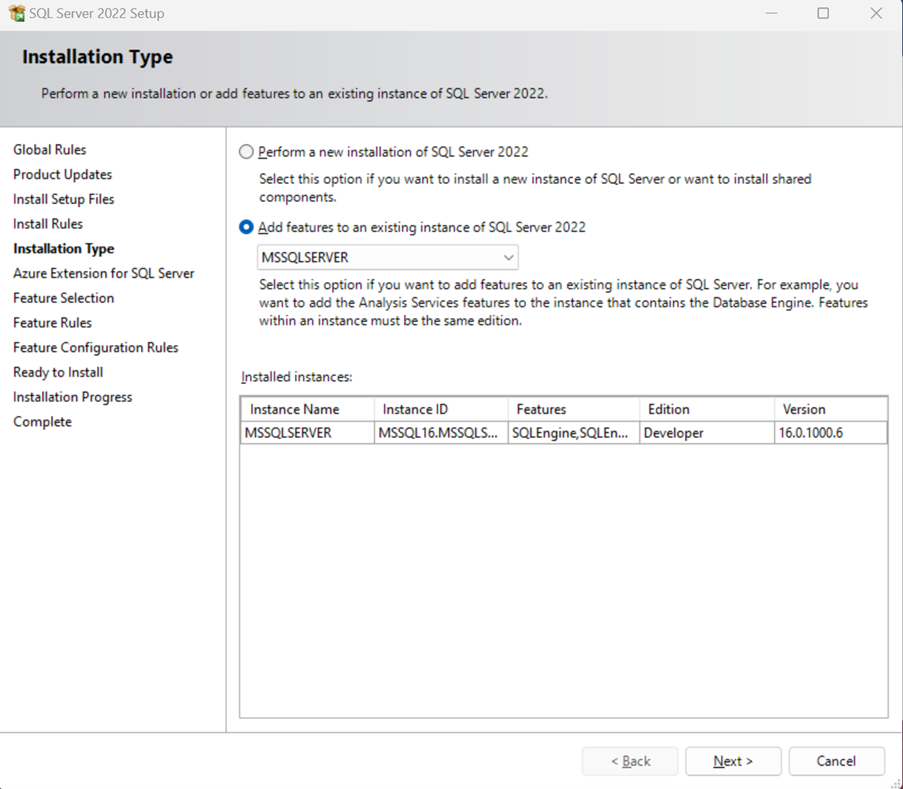
Select Next, and ensure you uncheck Azure Extensions then hit next
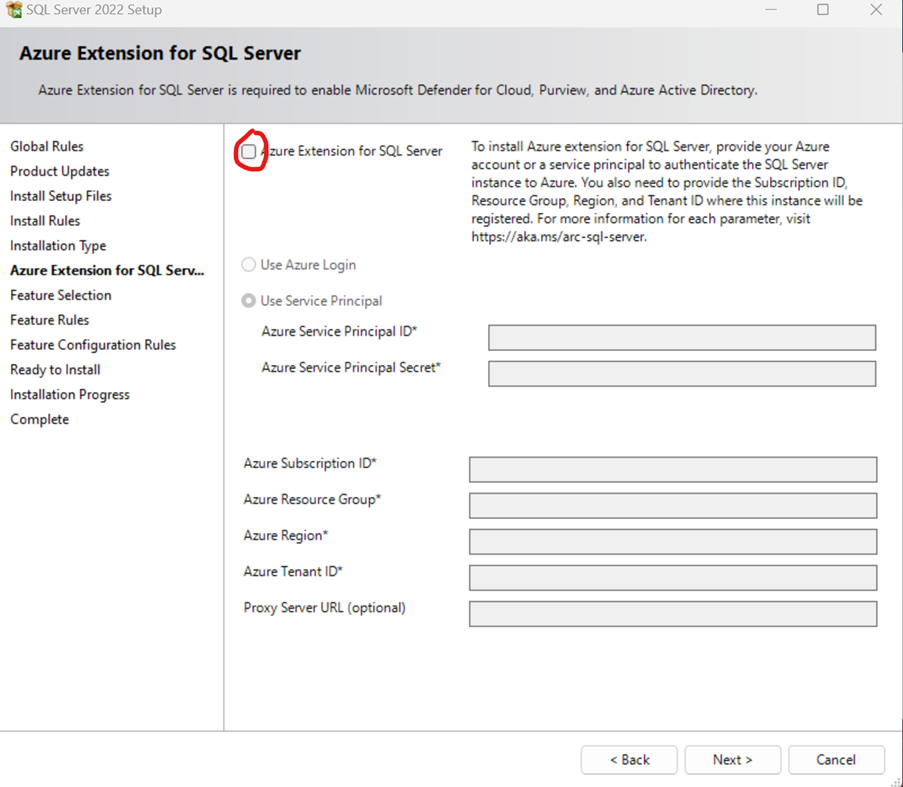
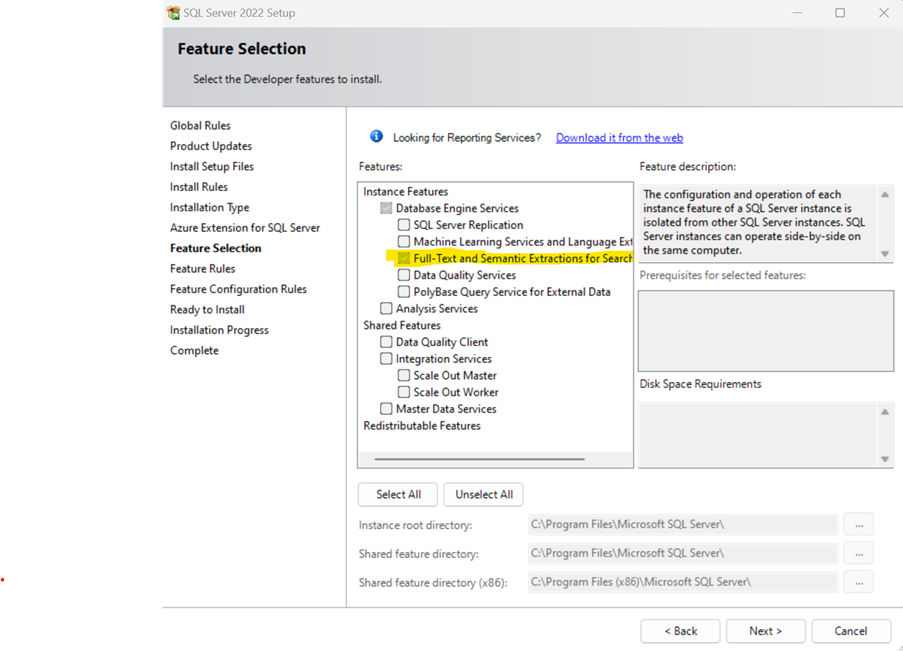
You will be presented with the following. Ensure the 'Full-Text and Semantic Extractions for search...' feature has been selected.
1.6. Install and Setup Visual Studio
Download and install visual studio here: https://visualstudio.microsoft.com/downloads/ (opens in a new tab)
- Select the Community version.
1.7. Install Azure SDK
NOTE: This step is in Vladan's guide on the Sinnefo repo. He suggests v2.9, but this isn't available anymore from the link given. TBC what needs to be done now.
1.8. Connect to the DevOps Server
To be able to retrieve the correct repo and use git commands to check out and push commits, you need to connect to DevOps within Visual Studio with your Microsoft credentials.
- In the 'Git Changes' or 'Team Explorer' tab, click the option to connect to a DevOps instance.
- Server to connect to: https://dev.azure.com/MoreIQHoldings/ (opens in a new tab)
From the splash screen
- Click 'Clone a repository'
Check out Solution
Connect to the 'MoreCore Platform' project, 'MoreCore Platform' repo, 'PMMS' solution.
Git Pull latest changes to the master branch
Be sure you have the latest code as this will govern
1.9. Install .NET Framework
As the version of .NET framework in use in the solution is old, it is likely necessary to install the specific versions in use. You will be prompted to do this when you first open the solution in Visual Studio, as per the below screenshot.
- Select the 'Download .NET Framework 4.6.1 targeting pack (opens in browser)' option. A web browser window will open with a microsoft soft site listing various .NET versions.
- Navigate to the required version, which is in the '.NET Framework' > 'Out of support versions' section.
- Download and install the 'Developer Pack' option.
- The message will repeat for all projects in the solution.
You may also see a message within the Solution Explorer indicating that a target .NET versions needs to be installed. Click the install button to launch the Visual Studio Installer and follow the steps to install each required .NET version. Multiple versions are needed as there are function apps that utilise different .NET versions to the main project.
1.10. Install T4 Toolbox
T4 Toolbox extends the code generation functionality of Text Template Transformation Toolkit (T4) built into Visual Studio and allows you to:
- Generate multiple output files from a single text template
- Automatically add output files to one or more projects and folders
- Automatically add or check-out generated files from source control
- Edit text templates in Visual Studio with syntax colorization, outlining, QuickInfo tooltips and error reporting
Select the appropriate link for the version of Visual Studio you are using.
-
VS2019: T4Toolbox VS Extension. This is not officially available for VS2019, so it needs to be downloaded from: https://github.com/olegsych/T4Toolbox/pull/60 (opens in a new tab)
-
VS2022: T4Toolbox VS Extension. This is not officially available for VS2022, so it needs to be downloaded from: https://github.com/Ch0senOne/T4Toolbox/releases (opens in a new tab)
- Download and install the T4Toolbox.17.0.0.0.vsix file (Visual Studio needs to be closed)
2. Configure Dependencies
2.1. Restore NuGet Packages
- Navigate to the Solution Explorer
- Right-click on the top-most Solution node
- Select the 'Restore NuGet Packages' menu option
TODO: Image
2.2. Install Dependencies
Install dependencies ( Node modules)
- Open a Windows Command Prompt.
- Ensure the correct version of Node is in use as per above. If you have installed NVM-Windows, use
nvm listto see what Node versions are installed. Usenvm use 18.20.7to ensure you are using the correct one.
- Ensure the correct version of Node is in use as per above. If you have installed NVM-Windows, use
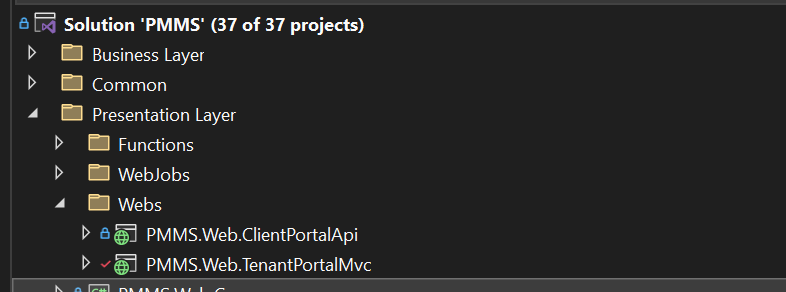
- Navigate to the PMMS\Webs\PMMS.Web.TenantPortalMvc\Scripts directory.
- The easiest way to do this is to right-click on the 'PMMS\Webs\PMMS.Web.TenantPortalMvc project in the Solution Explorer and select 'Open Folder in File Explorer', then copy the path.
- Run command:
npm install-
The npm install command is one of the most commonly used commands in Node.js development. It allows developers to install dependencies from the package.json file as well as additional packages from the npm registry. This command simplifies the process of setting up a project managing dependencies and ensuring all necessary modules are available for development.
- This will take a few minutes.
- It is likely that ThreatLocker will block this and require a request to be submitted.
-
- Once all modules have been installed, you will need to run the following command.
- Run command:
npm run-script webpack-dev -
Webpack is a utility that bundles all the JavaScript files together.
- Run command:
note: Leave the Windows Command window open until the command completes..
2.3. Initialise SQL Server
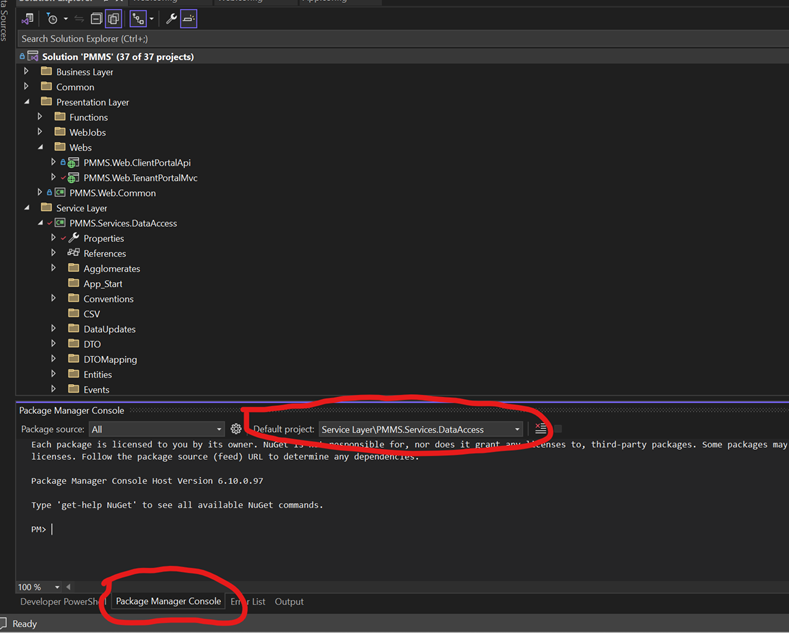
- Open Package Manager console in Visual Studio
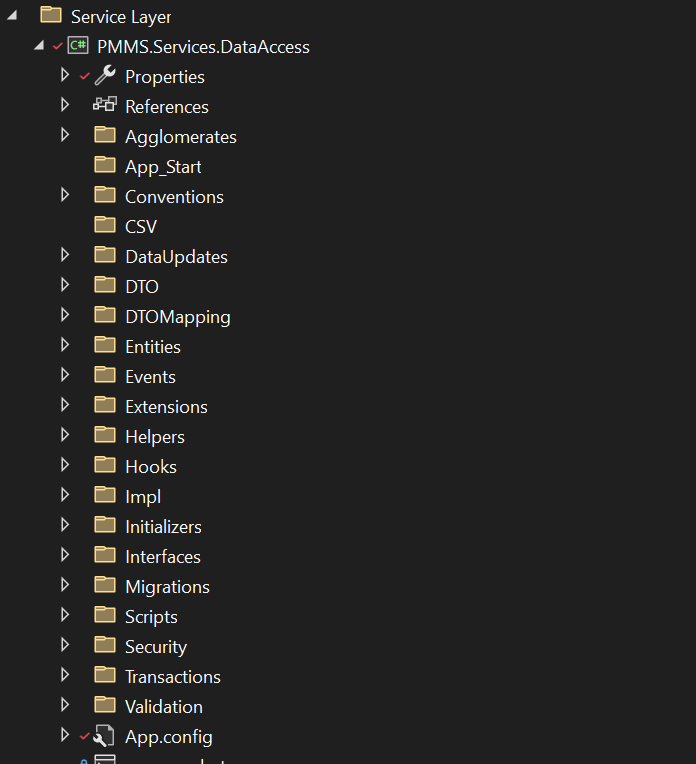
- In the 'Default project' field, select PMMS.Services.DataAccess
- Run the 'Update-Database' command to initialize SQL server database.
TODO Notes: BM - This doesn't work numerous errors related to dll's not found. Likely needs dependcies installed first.
2.4. Setup Database Test Data
SR TODO:
Update project configuration to Local
You will need to update the web.xml configuration in a couple of places. See the instructions below.
Under both ClientPortalApi and TenantPortalMvc there is a web.xml file.
You will need to change the connectionString tag. See below.

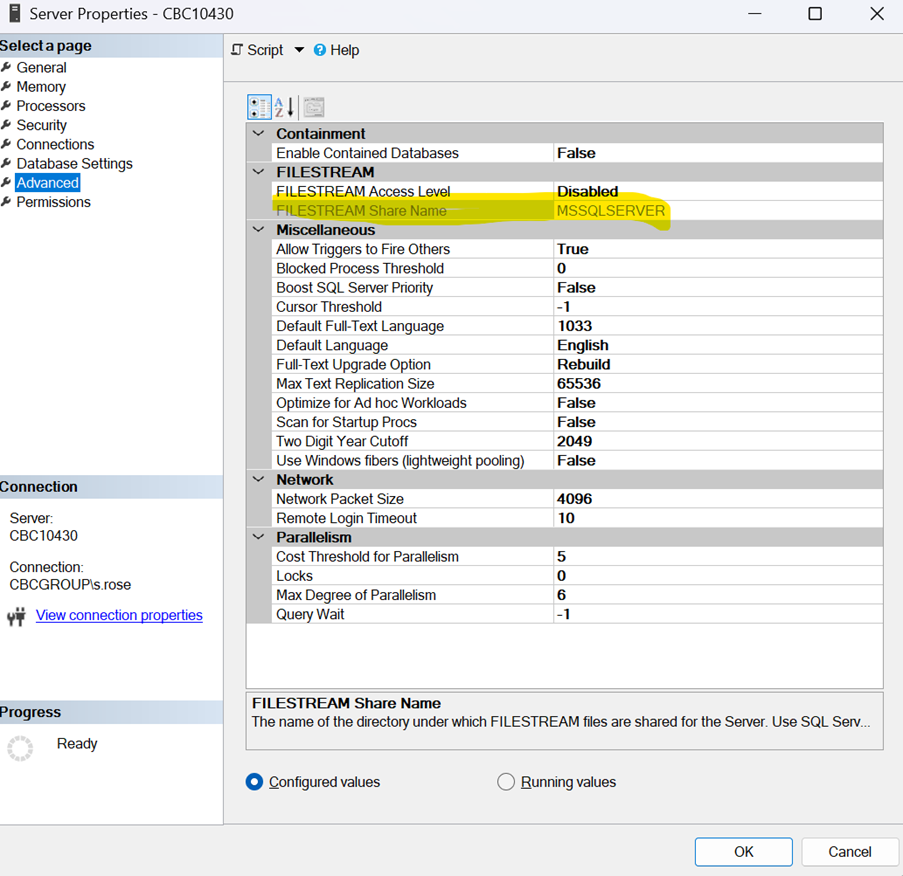
The Data Source will need to be reflective of your SQL Database server. You can find the name of the MS SQL details from the Server Management Studio.
In aAddition to changing the connection string tag, you should, for development purposes, also change the redisConnectionString to use NON SSL which will allow the application to run quicker.
Now, under the PMMS.Services.DataAccess project, you will also need to change the App.config file. Again, changing the ConnectionString as above.

Install dependantdependencies ( nNode modules)
-
Open a Windows Command Prompt.
-
Navigate to the PMMS\Webs\PMMS.Web.TenantPortalMvc\Scripts directory.
-
Run command: 'npm install'
-
Once all modules have been installed, you will need to run
-
Run command: 'npm run-script webpack-dev' note: Leave the Windows Command window open until complete.
Software Installation required
-
Azure SDK - Download Azure SDKs and Tools | Microsoft Azure
-
Ensure you have Cosmos DB emulator installed locally.
-
Ensure you have Azure Storage Emulator installed locally.
-
Ensure you have SQL Server 2016+ installed locally.
(from azure read.me)
-
SQL Server 2016 Community+
-
Node 14.19.1 (recommendation is to use nvm tool to manage multiple versions of Node.js)
-
npm 6.14.6
-
Azure SDK 2.9 https://www.microsoft.com/en-us/download/details.aspx?id=48178 (opens in a new tab)
-
VS2019: T4Toolbox VS Extension. This is not officially available for VS2019, so it needs to be downloaded from: https://github.com/olegsych/T4Toolbox/pull/60 (opens in a new tab)
-
VS2022: T4Toolbox VS Extension. This is not officially available for VS2022, so it needs to be downloaded from: https://github.com/Ch0senOne/T4Toolbox/releases (opens in a new tab)
3. Run the Application Locally
3.1. Set Startup Projects
Set up startup projects in Visual Studio. This instructs Visual Studio which projects to run when the Start function is used. Steps:
-
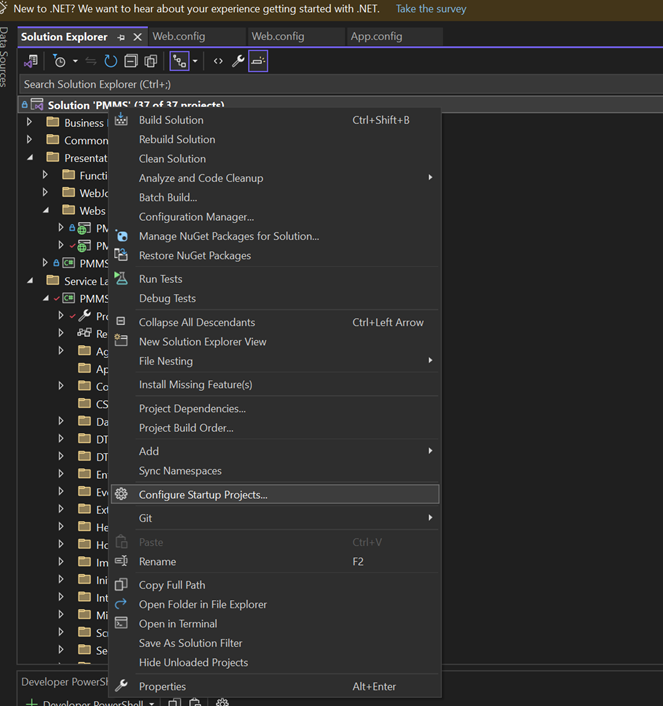
In the Solution Explorer, (right click on the topmost ‘project’ node and select ‘Configure startup projects’.)
-
Select projects: PMMS.Web.ClientPortalApi and PMMS.Web.TenantPortalMVC.
Select projects: PMMS.Web.ClientPortalApi and PMMS.Web.TenantPortalMVC.
3.2. Start the Application
Start the solution in Visual Studio. Steps:
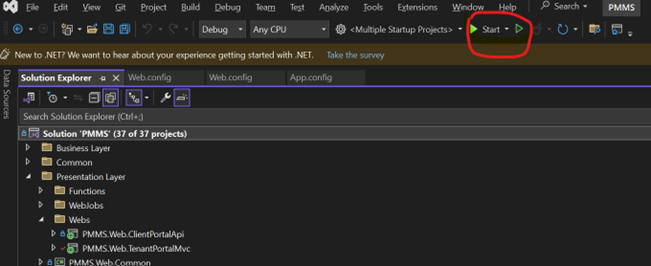
- In the main ribbon, click ‘Start’.

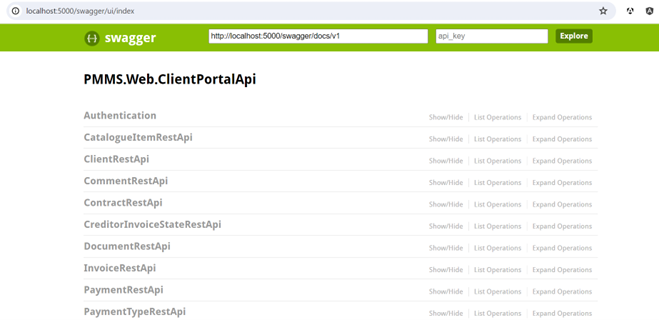
At this point, 2 applications will be served. : The MVC application at port :5175 and API application at port :5000.
4. Optional Tools
- APIdog
- Chrome Extension – Angular DevTools (requires Angular >= V12)
SQL Server Managemnt Studio (SSMS)
SQL Server Management Studio (SSMS) is an integrated environment for managing any SQL infrastructure, from SQL Server to Azure SQL Database. SSMS provides tools to configure, monitor, and administer instances of SQL Server and databases. Use SSMS to deploy, monitor, and upgrade the data-tier components used by your applications and build queries and scripts.
Download here: https://learn.microsoft.com/en-us/ssms/download-sql-server-management-studio-ssms (opens in a new tab)
Chrome Extension – Angular DevTools (requires Angular >= V12)
5. Troubleshooting
TenantPortalMvc can't be loaded
If the TenantPortalMvc project fails to load with an error similar to 'Microsoft.CSharp.Core.targets" was not found', you can try these steps:
- Navigate to the 'packages' folder of the solution, which can be reached by opening the folder path from the Solution node.
- Find the offending packge folder.
- Back the folder up
- Close VS
- Delete the folder from the packages folder
- Restart VS
Errors with packages
Package errors appear in the console.
- Close VS
- Backup and remove the content of the 'packages' folder
- Re-open VS
- A NuGet restore operation will occur automatically.